ROLLING WAVES BIRTHDAY
CASED: Rochelle Laird-Smith

HOW TO CREATE & ASSEMBLE:
- Take the a piece of white cardstock and run it through the die cut machine using the two larger wave dies.
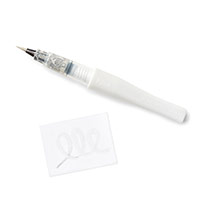
- Use the water painter to create a water color effect on a strip of white cardstock. WITHOUT squeezing the painter, run it on an ink pad then the paper. Any time you are going to place the aqua painter on a new color please clean off the painter by running the brush on a piece of scrap paper. When you have created the water color look that you like, see it aside to allow it to dry before you run it through with the die. (See step 8)
- Run the (4" x 5 1/4") white cardstock through the embossing machine in the Timeworn embossing folder (Or any folder of choice just to give it some texture). Adhere to the front cover of the card.
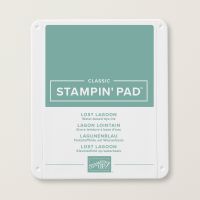
- Take the smaller piece of Cabana cardstock and run it through the die cut machine with the corresponding die. Stamp the sentiment in Lost Lagoon ink then tie the linen thread around it 3 times securing it in the back so it won’t move around. Using dimensionals®, adhere this to your card front.
- Take the smallest white piece of cardstock and shade the top half using the dauber and the Duckling Ink, on the lower half, use the stamp and the crumb cake ink on the lower half. Run it through the die cut machine with the corresponding die. Set it aside.
- Take the larger wave that you already die cut out and using the daubers and the Coastal Cabana and the Lost Lagoon inks, ink it to achieve the color you want. Trim it down to two pieces to fit on the small white cardstock.
- Take the other wave die and trim it down to fit. Use the crumb cake and stamp a couple of sand dots on it then layer these three pieces to create your scene. Adhere this to your card front using Dimensionals ®
- Now run the paper that you water colored and run it through the die cut machine using the little shells die. Use these to add to the “scene” on the front of your card.
- Use a little Wink of Stella to sparkle up the shells. Add a bow to the front.
- Take the another 4" x 5 1/4") piece of white cardstock, stamp the inside sentiment, shade a little color in the bottom corner and add a few of the extra shells. Adhere this to the inside of your card. Do the same to the front of your envelope.
WHAT YOU’LL NEED:
![Rolling Waves Bundle (English) [ 167145 ]](https://assets1.tamsnetwork.com/images/EC042017NF/167145s.jpg "Rolling Waves Bundle (English) [ 167145 ]")
![Textured Notes Dies [ 165555 ]](https://assets1.tamsnetwork.com/images/EC042017NF/165555s.jpg "Textured Notes Dies [ 165555 ]")
![Timeworn Type 3 D Embossing Folder [ 156505 ]](https://assets1.tamsnetwork.com/images/EC042017NF/156505s.jpg "Timeworn Type 3 D Embossing Folder [ 156505 ]")
![Coastal Cabana 8-1/2" X 11" Cardstock [ 131297 ]](https://assets1.tamsnetwork.com/images/EC042017NF/131297s.jpg "Coastal Cabana 8-1/2\" X 11\" Cardstock [ 131297 ]")
![Basic White 8 1/2" X 11" Cardstock [ 166780 ]](https://assets1.tamsnetwork.com/images/EC042017NF/166780s.jpg "Basic White 8 1/2\" X 11\" Cardstock [ 166780 ]")
![Darling Duckling Classic Stampin' Pad [ 165277 ]](https://assets1.tamsnetwork.com/images/EC042017NF/165277s.jpg "Darling Duckling Classic Stampin' Pad [ 165277 ]")
![Coastal Cabana Classic Stampin' Pad [ 147097 ]](https://assets1.tamsnetwork.com/images/EC042017NF/147097s.jpg "Coastal Cabana Classic Stampin' Pad [ 147097 ]")
![Crumb Cake Classic Stampin' Pad [ 147116 ]](https://assets1.tamsnetwork.com/images/EC042017NF/147116s.jpg "Crumb Cake Classic Stampin' Pad [ 147116 ]")
![Calypso Coral Classic Stampin' Pad [ 147101 ]](https://assets1.tamsnetwork.com/images/EC042017NF/147101s.jpg "Calypso Coral Classic Stampin' Pad [ 147101 ]")
![Blending Brushes [ 153611 ]](https://assets1.tamsnetwork.com/images/EC042017NF/153611s.jpg "Blending Brushes [ 153611 ]")
![Linen Thread [ 104199 ]](https://assets1.tamsnetwork.com/images/EC042017NF/104199s.jpg "Linen Thread [ 104199 ]")
![Multipurpose Liquid Glue [ 110755 ]](https://assets1.tamsnetwork.com/images/EC042017NF/110755s.jpg "Multipurpose Liquid Glue [ 110755 ]")
![Stampin' Seal [ 152813 ]](https://assets1.tamsnetwork.com/images/EC042017NF/152813s.jpg "Stampin' Seal [ 152813 ]")
![Mini Stampin' Dimensionals [ 144108 ]](https://assets1.tamsnetwork.com/images/EC042017NF/144108s.jpg "Mini Stampin' Dimensionals [ 144108 ]")
![Water Painters [ 168253 ]](https://assets1.tamsnetwork.com/images/EC042017NF/168253s.jpg "Water Painters [ 168253 ]")
![Clear Block I [ 118488 ]](https://assets1.tamsnetwork.com/images/EC042017NF/118488s.jpg "Clear Block I [ 118488 ]")
![Stampin' Cut & Emboss Machine [ 149653 ]](https://assets1.tamsnetwork.com/images/EC042017NF/149653s.jpg "Stampin' Cut & Emboss Machine [ 149653 ]")
![Basic White Medium Envelopes [ 159236 ]](https://assets1.tamsnetwork.com/images/EC042017NF/159236s.jpg "Basic White Medium Envelopes [ 159236 ]")


![Words & Wishes Bundle (English) [ 167897 ]](https://assets1.tamsnetwork.com/images/EC042017NF/167897s.jpg "Words & Wishes Bundle (English) [ 167897 ]")
![Eyelet Blooms Die [ 167984 ]](https://assets1.tamsnetwork.com/images/EC042017NF/167984s.jpg "Eyelet Blooms Die [ 167984 ]")
![Real Red 8-1/2" X 11" Cardstock [ 102482 ]](https://assets1.tamsnetwork.com/images/EC042017NF/102482s.jpg "Real Red 8-1/2\" X 11\" Cardstock [ 102482 ]")
![Basic Black 8-1/2" X 11" Cardstock [ 121045 ]](https://assets1.tamsnetwork.com/images/EC042017NF/121045s.jpg "Basic Black 8-1/2\" X 11\" Cardstock [ 121045 ]")
![Tuxedo Black Memento Ink Pad [ 132708 ]](https://assets1.tamsnetwork.com/images/EC042017NF/132708s.jpg "Tuxedo Black Memento Ink Pad [ 132708 ]")
![Real Red & Burlap Ribbon Combo Pack [ 160386 ]](https://assets1.tamsnetwork.com/images/EC042017NF/160386s.jpg "Real Red & Burlap Ribbon Combo Pack [ 160386 ]")
![Stampin' Dimensionals [ 104430 ]](https://assets1.tamsnetwork.com/images/EC042017NF/104430s.jpg "Stampin' Dimensionals [ 104430 ]")
![Clear Block D [ 118485 ]](https://assets1.tamsnetwork.com/images/EC042017NF/118485s.jpg "Clear Block D [ 118485 ]")

![Fabulous Sayings Photopolymer Stamp Set (English) [ 167972 ]](https://assets1.tamsnetwork.com/images/EC042017NF/167972s.jpg "Fabulous Sayings Photopolymer Stamp Set (English) [ 167972 ]")
![With You In Mind Photopolymer Stamp Set (English) [ 169063 ]](https://assets1.tamsnetwork.com/images/EC042017NF/169063s.jpg "With You In Mind Photopolymer Stamp Set (English) [ 169063 ]")
![Stylish Shapes Dies [ 159183 ]](https://assets1.tamsnetwork.com/images/EC042017NF/159183s.jpg "Stylish Shapes Dies [ 159183 ]")
![Pinewood Planks 3D Embossing Folder [ 152320 ]](https://assets1.tamsnetwork.com/images/EC042017NF/152320s.jpg "Pinewood Planks 3D Embossing Folder [ 152320 ]")
![Night Of Navy 8-1/2" X 11" Cardstock [ 100867 ]](https://assets1.tamsnetwork.com/images/EC042017NF/100867s.jpg "Night Of Navy 8-1/2\" X 11\" Cardstock [ 100867 ]")
![Pecan Pie 8 1/2" X 11" Cardstock [ 161717 ]](https://assets1.tamsnetwork.com/images/EC042017NF/161717s.jpg "Pecan Pie 8 1/2\" X 11\" Cardstock [ 161717 ]")
![Night Of Navy Classic Stampin' Pad [ 147110 ]](https://assets1.tamsnetwork.com/images/EC042017NF/147110s.jpg "Night Of Navy Classic Stampin' Pad [ 147110 ]")
![Cajun Craze & Gold Dots [ 165984 ]](https://assets1.tamsnetwork.com/images/EC042017NF/165984s.jpg "Cajun Craze & Gold Dots [ 165984 ]")
.jpeg)


