Pages

Wednesday, April 9, 2025

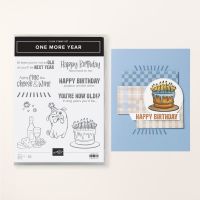
You're How Old??

I think this stamp test is so hysterically funny.  You can have lots of fun with it.  On my list of supplies, I did not include the Stampin' Blends that I used.  Use whatever colors you want to use to add color.  

YOU’RE HOW OLD!?


HOW TO CREATE & ASSEMBLE:  

  1. Fold and burnish your card (5 1/2” x 8 1/2” scored @ 4 1/4’) on the score line.
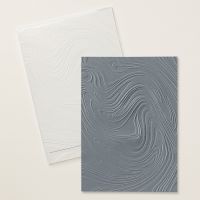
  2. Run your (3 1/2” x 5 1/2”) piece of Melon Mambo cardstock through the emboss machine in the Swirly embossing folder. Adhere this butted up to the fold on the card front. (Optional: run the flap of the envelope through the emboss machine in the folder so that your envelope will coordinate.) 
  3. Adhere the 1/4” strip gray cards stock along side the Mambo you just adhered.
  4. Adhere the 2 3/4”square of Gray Granite to your card front
  5. On the 2 1/2” square of white cardstock, stamp your image in Tuxedo Black and color in however. You would like to. To get the two different colored bursts, I used the Stampin’ Write markers and colored the stamp then stamped.  Please DO NOT use the blends to color stamps. Adhere this on the gray square.
  6. On your small strip of white cardstock stamp the sentiment then adhere it to the strip of Gray Granite cardstock.  Adhere to your card front using dimensionals.  
  7. Stamp the additional sentiment and design on the (4” x 5 1/4”) white cardstock then adhere to the inside of your card.

WHAT YOU’LL NEED:
Wednesday, April 2, 2025

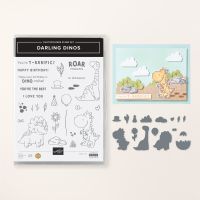
Darling Dinos Cascading Pleat Cards

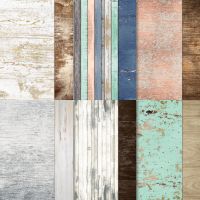
I didn't include the Stampin' Blends used on my card because you can use your artistic freedom to color your dinosaurs and balloons whatever color you would like. I opted for colors that coordinated with the Country Woods Designer Series Paper that I used.  

 DARLING DINOS CASCADING PLEAT CARD

Cased Stamp With Deb


HOW TO CREATE & ASSEMBLE: 

  1. Card base is 5 1/2” x 8 1/2” scored on the long side at 1 1/16”, 2 2/16”, 3 3/16”, and 4 1/4” 
  2. Turn to the short scored side and make a mark at 3/4” draw a line to the 3rd score lined then diagonally from there to the top of the 4th score line.  Cut this piece off.
  3. Measure another 3/4” lower and draw a line to the 1st score line then diagonally up to the 2nd score line.  Cut this piece out.
  4. Fold and burnish
  5. On the ( 3 3/4” x 5 1/4”) piece of White cardstock , stamp the 3 dinosaurs, balloons, hat and tie.  Color them with the blends then die cut them out.  Set them all aside until you are ready to adhere the on to the different panels. 
  6. BACK PANEL:
    1. Adhere the (5 1/4” x 4”) piece White cardstock to inside of card.
    2. Adhere the ( 5” x 3 3/4”) piece of DSP on top of the white.
    3. Stamp your sentiment on the (4 1/2” x 3 1/4”) piece of White cardstock.  Adhere this on the DSP.
    4. Adhere your dinosaur on the bottom right corner ( or wherever you want him)
  7. MIDDLE PANEL:
    1. Adhere the (4 3/4” x 3 1/2”) piece of Pool Party Cardstock to the 3rd panel/fold, creating the middle panel.
    2. Adhere the (4 1/2” x 3 1/4”) piece White cardstock to this panel..
    3. Adhere the ( 4 1/4” x 3”) piece of DSP on  the White.
    4. Stamp your sentiment on the (3 3/4” x 2 1/2”) piece of White cardstock.  Adhere this on the DSP.
    5. Adhere your dinosaur and if you want to stamp the balloons, I’ve given you a small bow to attach at the bottom of the balloon lines you stamp.
  8. FRONT PANEL:
    1. Adhere the (4” x 2 3/4”) piece of Pool Party Cardstock to the 1st panel/fold, creating the front panel.
    2. Adhere the (3 3/4” x 2 1/2”) piece White cardstock to this panel..
    3. Die cut out the shape for the front piece from the (3 1/4” x 2”) piece of White cardstock,   then stamp your sentiment on it.  Adhere this on the DSP.
    4. Adhere your Dino to the front along with the balloons and string.  

10.  (Optional) Adhere a 2 1/4” x 6” piece of DSP to the envelope flap and trim out.  Your other option would be to stamp something on the envelope that would coordinate with what you stamped on the inside.


WHAT YOU’LL NEED:

Wednesday, March 26, 2025

THANKS SO MUCH SEED POUCH

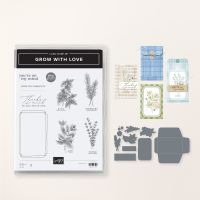
 These pouches are super easy to assemble and along with the little card, we included little seed packets and planting instructions for the recipient.  These pouches/pockets are also the perfect size for gift cards!

THANKS SO MUCH SEED POUCH

CASED AMY KOENDERS


HOW TO CREATE & ASSEMBLE:  

  1. Lay the “pocket” die on your (6” x 6”) piece of DSP, so you know where to stamp the design that will be on the front of your pocket.
  2. Stamp the design.  Outside “frame” in Espresso and then the them in Olive inside the frame.
  3. Run this through the Stampin’ Cut & Emboss Machine.  Fold at the score lines.  First folding in the larger “flaps”and adhering them closed.
  4. Fold up the smallest “flap” and adhere closed.  (Forming a pocket) Set aside.
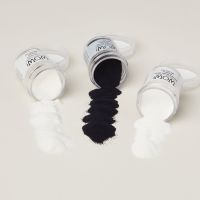
  5. On your (1 1/2” x 2 1/2”) piece of Blackberry cardstock, stamp your sentiment in VersaMark® then sprinkle with white embossing powder and heat with the heat tool.  Once it has set for a minute, run it through the die cut machine.  (Note that the sentiment I used is part of a stamp so I covered the words I didn’t want with post it tape, inked the pad, removed the tape and THEN stamped. ) Set aside.
  6. Take your small (2 1/4” x 7 scored @ 3 1/2”) note card, fold at the score line.  Stamp the images on the front 
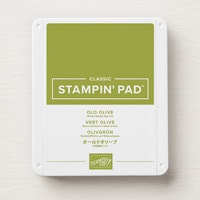
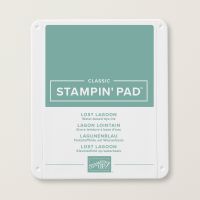
  7. Stamp an extra image of the plant on the small scrap of white cardstock in either old Olive or in Lost Lagoon; die cut it out and adhere it either to the front of the little note or the front of the pocket.  (I adhered to both so that you could see each.) If you want to do both, I have extra white scraps to do it.  
  8. Adhere the  die cut with the sentiment using dimensionals across the lower part of the plant. Adhere a little dragonfly to embellish.  
  9. With a scrap of the same color cardstock as the sentiment (Blackberry Bliss) die cut the circles for the “buttons”.
  10. On the back of one of these circles adhere a mini dimensional. Peel off the other side of the dimensional and adhere one end of the linen thread to it then adhere it to the loose flap of the pocket. Pinch it tight to make sure it sticks well.  You may want to add a little drop of liquid glue to ensure a secure stick.
  11. Take the other circle and adhere a mini dimensional to it then adhere it to the pocket about 1/4” inch below the one on the flap.  Secure then wrap linen thread around the two like a figure 8 and trim off any excess thread.
  12. Place your plastic envelope with the seeds in it inside your notecard then slide it into the pocket. Growing instructions are also provided. 

WHAT YOU’LL NEED:

Watercolor Birthday Card

I cased this card from a Stampin' Up! event that I attended.  It worked so well with the Watercolor Fluid  Paper and since I had not wor...