So this month I featured stamps that are all being retired. If you like them you had better go check out the "LAST CHANCE" section on my website to shop for them before they are gone. The Seaside Wishes Bundle is one I am NOT willing to part with. I absolutely love it!
SOMETIMES THE SIMPLEST THINGS. . .
Cased Cards’ Stuff with Gail
HOW TO CREATE & ASSEMBLE:
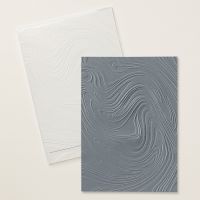
- Take your (4” x 5 1/4”) piece of white cardstock and run it through the emboss machine in the Seaside Wishes Embossing folder. Adhere it to the card front.
- Adhere the (1” x 5 1/4”) piece of DSP vertically on the left side of the front. Run the (2 3/8” x 3 3/8”) piece of white cardstock through the emboss machine in the Seaside Wishes Embossing folder. Adhere it to the (2 1/2” x 3 1/2”) piece of Misty Moonlight cardstock. Adhere this centered to the front of your card.
- On thermal piece of white crd stock, stamp the sentiment and die cut it out. Adhere to the top right of your card using dimensionals®.
- Run the leftover piece of white and the piece of Crumb Cake cardstock throughout the die cut machine using both the die and embossing folder at the same time to get your textured sand dollars. Set aside. Rung the additional piece of moonlight cardstock through the die machine with the two different sizes o coral (?).
- Using scraps dies cut some reeds.
- Stamp a small starfish and die cut.
- Assemble all of your pieces to create your scene. (I used dimensionals® t adhere the foremost sand dollar.
- Stamp sentiment on the inside.
- Adhere the additional piece of DSP to your envelope flap so that your envelope will coordinate.
WHAT YOU’LL NEED:
.jpeg)
![Seaside Wishes Bundle (English) [ 163498 ] Seaside Wishes Bundle (English) [ 163498 ]](https://assets1.tamsnetwork.com/images/EC042017NF/163498s.jpg)
![Something Fancy Dies [ 160424 ] Something Fancy Dies [ 160424 ]](https://assets1.tamsnetwork.com/images/EC042017NF/160424s.jpg)
![Basic White 8 1/2" X 11" Thick Cardstock [ 159229 ] Basic White 8 1/2" X 11" Thick Cardstock [ 159229 ]](https://assets1.tamsnetwork.com/images/EC042017NF/159229s.jpg)
![Basic White 8 1/2" X 11" Cardstock [ 166780 ] Basic White 8 1/2" X 11" Cardstock [ 166780 ]](https://assets1.tamsnetwork.com/images/EC042017NF/166780s.jpg)
![Misty Moonlight 8-1/2" X 11" Cardstock [ 153081 ] Misty Moonlight 8-1/2" X 11" Cardstock [ 153081 ]](https://assets1.tamsnetwork.com/images/EC042017NF/153081s.jpg)
![Crumb Cake 8-1/2" X 11" Cardstock [ 120953 ] Crumb Cake 8-1/2" X 11" Cardstock [ 120953 ]](https://assets1.tamsnetwork.com/images/EC042017NF/120953s.jpg)
![Country Woods 12" X 12" (30.5 X 30.5 Cm) Designer Series Paper [ 163393 ] Country Woods 12" X 12" (30.5 X 30.5 Cm) Designer Series Paper [ 163393 ]](https://assets1.tamsnetwork.com/images/EC042017NF/163393s.jpg)
![Misty Moonlight Classic Stampin' Pad [ 153118 ] Misty Moonlight Classic Stampin' Pad [ 153118 ]](https://assets1.tamsnetwork.com/images/EC042017NF/153118s.jpg)
![Calypso Coral Classic Stampin' Pad [ 147101 ] Calypso Coral Classic Stampin' Pad [ 147101 ]](https://assets1.tamsnetwork.com/images/EC042017NF/147101s.jpg)
![Clear Block B [ 117147 ] Clear Block B [ 117147 ]](https://assets1.tamsnetwork.com/images/EC042017NF/117147s.jpg)
![Clear Block D [ 118485 ] Clear Block D [ 118485 ]](https://assets1.tamsnetwork.com/images/EC042017NF/118485s.jpg)
![Clear Block H [ 118490 ] Clear Block H [ 118490 ]](https://assets1.tamsnetwork.com/images/EC042017NF/118490s.jpg)
![Stampin' Cut & Emboss Machine [ 149653 ] Stampin' Cut & Emboss Machine [ 149653 ]](https://assets1.tamsnetwork.com/images/EC042017NF/149653s.jpg)
![Multipurpose Liquid Glue [ 110755 ] Multipurpose Liquid Glue [ 110755 ]](https://assets1.tamsnetwork.com/images/EC042017NF/110755s.jpg)
![Stampin' Dimensionals [ 104430 ] Stampin' Dimensionals [ 104430 ]](https://assets1.tamsnetwork.com/images/EC042017NF/104430s.jpg)
![Basic White Medium Envelopes [ 159236 ] Basic White Medium Envelopes [ 159236 ]](https://assets1.tamsnetwork.com/images/EC042017NF/159236s.jpg)
.jpeg)
![One More Year Cling Stamp Set (English) [ 164777 ] One More Year Cling Stamp Set (English) [ 164777 ]](https://assets1.tamsnetwork.com/images/EC042017NF/164777s.jpg)
![Textured Notes Dies [ 165555 ] Textured Notes Dies [ 165555 ]](https://assets1.tamsnetwork.com/images/EC042017NF/165555s.jpg)
![Blackberry Bliss 8-1/2" X 11" Cardstock [ 133675 ] Blackberry Bliss 8-1/2" X 11" Cardstock [ 133675 ]](https://assets1.tamsnetwork.com/images/EC042017NF/133675s.jpg)
![Bloom Impressions 12" X 12" (30.5 X 30.5 Cm) Designer Series Paper [ 164944 ] Bloom Impressions 12" X 12" (30.5 X 30.5 Cm) Designer Series Paper [ 164944 ]](https://assets1.tamsnetwork.com/images/EC042017NF/164944s.jpg)
![Tuxedo Black Memento Ink Pad [ 132708 ] Tuxedo Black Memento Ink Pad [ 132708 ]](https://assets1.tamsnetwork.com/images/EC042017NF/132708s.jpg)
.jpeg)
![Fields In Bloom Photopolymer Stamp Set [ 163750 ] Fields In Bloom Photopolymer Stamp Set [ 163750 ]](https://assets1.tamsnetwork.com/images/EC042017NF/163750s.jpg)
![Fluffiest Friends Bundle [ 162850 ] Fluffiest Friends Bundle [ 162850 ]](https://assets1.tamsnetwork.com/images/EC042017NF/162850s.jpg)
![Courage & Faith Cling Stamp Set (English) [ 161500 ] Courage & Faith Cling Stamp Set (English) [ 161500 ]](https://assets1.tamsnetwork.com/images/EC042017NF/161500s.jpg)
![Lemon Lolly 8 1/2" X 11" Cardstock [ 161720 ] Lemon Lolly 8 1/2" X 11" Cardstock [ 161720 ]](https://assets1.tamsnetwork.com/images/EC042017NF/161720s.jpg)
![Granny Apple Green Stampin' Pad [ 147095 ] Granny Apple Green Stampin' Pad [ 147095 ]](https://assets1.tamsnetwork.com/images/EC042017NF/147095s.jpg)
![Stampin' Write Markers Collection [ 163136 ] Stampin' Write Markers Collection [ 163136 ]](https://assets1.tamsnetwork.com/images/EC042017NF/163136s.jpg)
![Smoky Slate Stampin' Blends Combo Pack [ 154904 ] Smoky Slate Stampin' Blends Combo Pack [ 154904 ]](https://assets1.tamsnetwork.com/images/EC042017NF/154904s.jpg)
![Clear Block C [ 118486 ] Clear Block C [ 118486 ]](https://assets1.tamsnetwork.com/images/EC042017NF/118486s.jpg)
![Clear Block F [ 118483 ] Clear Block F [ 118483 ]](https://assets1.tamsnetwork.com/images/EC042017NF/118483s.jpg)
![Mini Glue Dots [ 103683 ] Mini Glue Dots [ 103683 ]](https://assets1.tamsnetwork.com/images/EC042017NF/103683s.jpg)
![Mini Stampin' Cut & Emboss Machine [ 150673 ] Mini Stampin' Cut & Emboss Machine [ 150673 ]](https://assets1.tamsnetwork.com/images/EC042017NF/150673s.jpg)
.jpeg)



.jpeg)