Pages

Wednesday, November 27, 2024

MASCULINE FUN-FOLD BIRTHDAY

On this eve of Thanksgiving I wish you all a blessed Thanksgiving.  I hope you enjoy the day with family and friends and be sure to count your blessings (If you can count that high.)

MASCULINE FUN-FOLD BIRTHDAY

 HOW TO CREATE & ASSEMBLE: 

  1. Fold the flaps in and burnish the scored cardstock.  Adhere this to the Misty Moonlight cardstock. 
  2. Adhere the DSP to the front-right side flap. Set aside.  
  3. Stamp a sentiment for the inside on the larger piece of white cardstock and adhere this to the inside of your card.
  4. Adhere the 2 3/4” square piece of misty cardstock on the left flap making sure that half of it overlaps the right side but DO NOT PUT GLUE ON THAT HALF! ( after all you do want the recipient to be able to open his card )
  5. Die cut out some leaves on the gray and Mossy scraps of cardstock and adhere them to the square.
  6. I found it easier to die cut first but do what works for you. Die cut the white piece of cardstock then stamp with the sentiment for the front. Adhere this to the front square.
  7. Tie a double bow in your twine and adhere it to the front of the card.
  8. (Optional) Adhere the additional piece of DSP to your envelope flap and trim it down.

WHAT YOU’LL NEED: 

Wednesday, November 20, 2024

CHANGING LEAVES SYMPATHY CARD

 CHANGING LEAVES SYMPATHY CARD

HOW TO CREATE & ASSEMBLE: 

  1. Stamp sentiment on smallest piece of Beige cardstock and die cut.  Set aside.
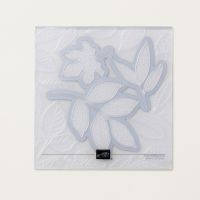
  2. Take the smallest piece of pebbled cardstock and run it through the die cut machine in the embossing folder with the die.  Ensuring the you place the cardstock over the leaf that you want die cut out.  ** You will want to place the die on the inside of the folder so that it encases then set the cardstock on top of that then closing and running through. 
  3. Take the next smallest piece of beige and run it through the emboss machine in the 3D embossing folder. (Remember to remove the die from the folder)
  4. (Optional) Run the flap of your envelope through the emboss machine in the embossing folder.
  5. Stamp an inside sentiment on one of the larger pieces of beige cardstock.
  6. Now let’s start assembling.  Fold and burnish your card base.
  7. Adhere the inside stamped piece to the inside of your card.
  8. Adhere the die cut leaf to the  embossed piece of beige cardstock using dimensionals.
  9. Wrap the linen thread twice around the piece of embossed beige cardstock tying a bow off to the left over the stem of the leaf.
  10. Adhere the sentiment over the linen thread with dimensionals. 
  11. Adhere this to the piece of pebbled cardstock then adhere this to the other largest piece of beige cardstock and finally adhere this to the card front.
  12. Your card is done! :0)

WHAT YOU’LLL NEED: 

Wednesday, November 13, 2024

SPEEDY RECOVERY (Planted Paradise)

This card is clean and simple.  Just stamping and paper.  I  used assorted scraps of ribbon to embellish a bit but I did not include them on my supply list because any scrap you have on hand will work.  I think I used scraps of retired ribbon.   

SPEEDY RECOVERY


HOW TO CREATE AND ASSEMBLE: 

  1. Fold and burnish your card base on the score line.  Set aside. 
  2. Take your piece of white cardstock stamp the sentiment along the bottom leaving enough space above it so that there is space for your pots and plants.
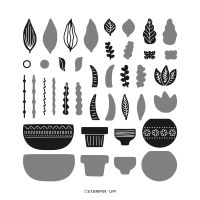
  3. Stamp your pots in the colors of your choice.  I chose to start with the one in the middle to center and ensure I had space for the other two. (Optional) While you are stamping your pots, stamp one on your envelope front and one on the inside of your card
  4. When you are ready to stamp the greenery in each pot, use a sticky note to cover the pot so that you do not stamp on it. 
  5. Add the bow to the middle pot and then add piece of ribbon to one of the other pots.

WHAT YOU’LL NEED: 

Wednesday, November 6, 2024

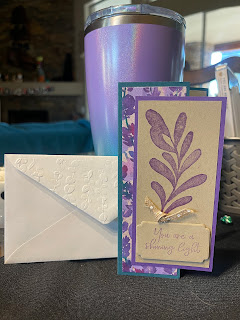
YOU ARE A SHINING LIGHT

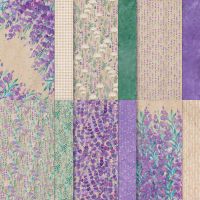
A couple of things for you to know, I usually always include links to both Stampin' Seal and Multipurpose Liquid Glue but not because you need both but so the you can choose which you prefer. Personally I tend to reach for the glue over the stampin' seal.  I also included mini glue dots but you are only going to need one dot so you can adhere the little bow with whatever you would like.  I like the glue dots for adhering bows. And, I used 3 1/2" x 6 1/2" envelopes (the ones usually used to mail a letter to a friend.)

YOU ARE A SHINING LIGHT

HOW TO CREATE & ASSEMBLE: 

  1. Score and burnish your (5 1/2” x 6” scored @ 2”) card base.
  2. Adhere your (1 3/4” x 5 3/4”) piece of DSP on the front of the small flap.
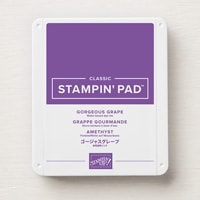
  3. Stamp your design towards the top on your (2 1/4” x 5”) piece of Crumb Cake cardstock.  Adhere this to the (2 1/2” x 5 1/4”) piece of Grape cardstock.
  4. Adhere this centered top from bottom and offset to the right of the flap as to leave approximately the same width border all around.
  5. On your other (3 1/4” x 5 3/4”) piece of Crumb Cake cardstock, stamp a sentiment and adhere to the inside of. Your card.
  6. On your small scrap of crumb cardstock, stamp your sentiment then die cut.  Adhere using dimensionals to your card front.
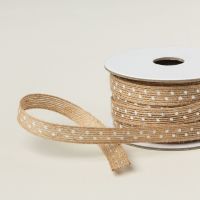
  7. Tie a little knot in your piece of ribbon and adhere it to your card front using glue dot.
  8. Emboss the envelope flap.  

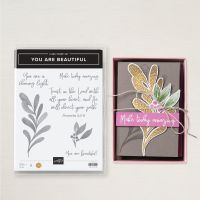
WHAT YOU’LL NEED:

DAD, THANKS FOR BEING THE BEST

  DAD, THANKS FOR BEING THE BEST HOW TO CREATE & ASSEMBLE: Run three (2” x 3 1/2”) pieces of DSP through the Die machine with the corr...