When you make this card, it is all about the Autumn colors so we used scraps of different colors of cardstock to add leaves/branches and we used some retired gems but you can use whichever gems you want to embellish your card.
AUTUMN LEAVES WITH A GRATEFUL HEART
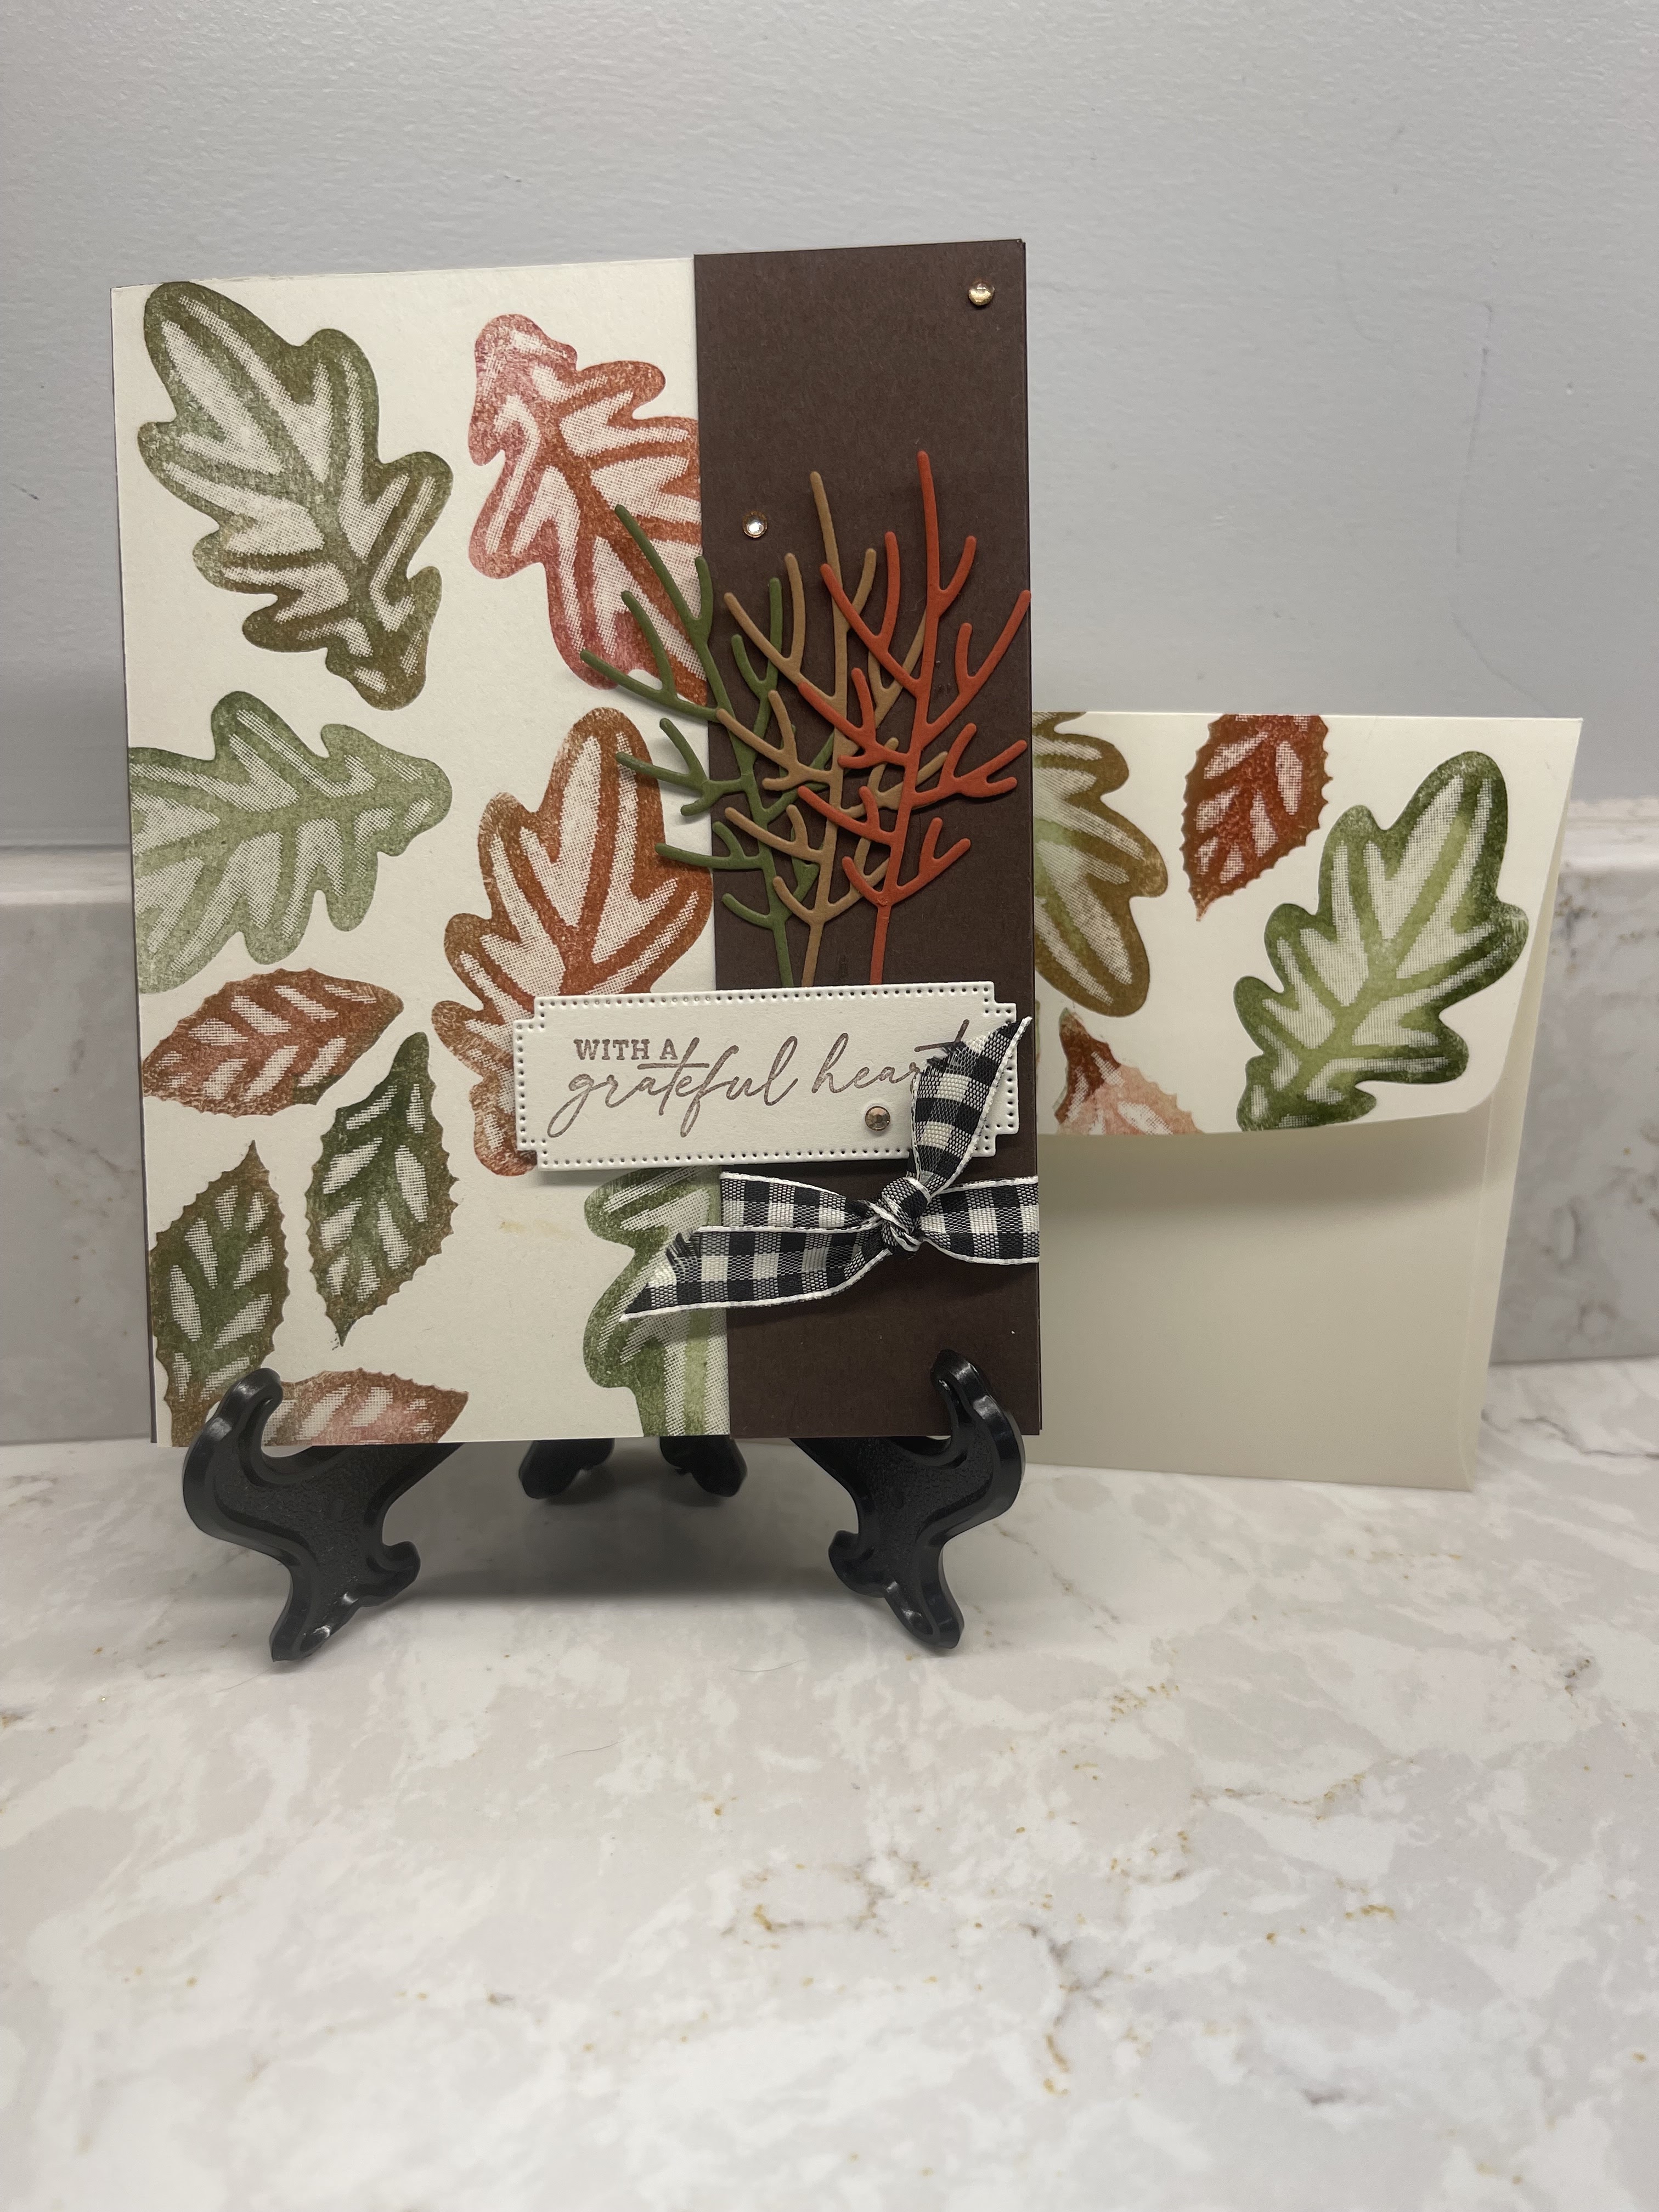
HOW TO CREATE & ASSEMBLE:
- Fold and burnish your card base (5 1/2” x 8 1/2”scored at 4 1/4”) on the score line.
- You’re going to be using the same procedure on the two pieces of beige cardstock and on the envelope flap so lay them out on your work area. You will be randomly stamping leaves. Ink first with a lighter color and then, using a dauber, add a second color of ink around the edges of the stamp and stamp. PLEASE BE SURE TO CLEAN the stamp in between inking..
- Adhere the (4” x 5 1/4”) piece on the inside of your card and the slightly larger piece (4 1/4” x 5 1/2”) of stamped cardstock to the front of your card base.
- Tie the small piece of ribbon around the bottom of the (1 1/2” x 5 1/2”) strip of Early Espresso then adhere this to the right front of the card base.
- On a small piece of Beige cardstock, stamp the sentiment and die cut it out.
- Die cut some branches in different colors of cardstock. Adhere these down on the espresso strip.
- Using dimensionals, adhere the sentiment above the bow and over the stems of the branch die cuts.
- Adhere some gems to embellish.
WHAT YOU’LL NEED:
")


 Large Check Ribbon")


")


 Designer Series Paper")


")


")
")


 Designer Series Paper")

 Textured Ribbon")


.jpeg)